Monday, March 11, 2013

Easter Wishes Carrot Box

I love Easter baskets and all the cute eggs and things that get filled in them! This year I’m whipping up a couple of these easy carrot boxes to put treats in for my kiddos to slide into their baskets. 
Carrot Box 1
These carrot boxes go pretty quickly when you assemble them, and are even easier to decorate. I used the A Little Bit of Spring set to stamp the eggs onto the Pumpkin Pie cardstock, and tied it together with Old Olive ribbon (Spring Mini) and topped it off a punched out tag and the bunny and sentiment from A Little Bit of Spring.
Carrot Box 2
The bunny was colored with blender pens and I used Bashful Blue, Pretty in Pink and Daffodil Delight to color her in.

Carrot Box 3
You could also do a boy version of this tag with the cute boy bunny included in the stamp set.
You can download the pdf for the carrot box here: https://www.box.com/shared/ld0ll958d4

This set is great for projects that aren’t Easter related but focus more on Spring. Join me all week for more project ideas!
ALBS

Saturday, March 9, 2013

Butterfly Note Card Set

Today is the last day of butterfly week, and I hope you enjoyed seeing all the possibilities with the Papillion Potpourri stamp set!

For my final project I did a mini note card set. These cards are 3x4 and are perfect to tuck into a little gift, a lunch for a kiddo, or a as a surprise for your sweetie.
Note Card Set 1

Note Card Set 2
For these cards I played on four colors, More Mustard, Red Riding Hood, Plum and Basic Gray. I layered and stacked the butterflies and then added a sentiment from the Lacy and Lovely set (which is quickly becoming a favorite you will see more of soon!) A tiny bit of Cherry Cobbler Bakers Twine finished it off for a quick and easy, but cute little card set.

That' wraps up Butterfly week, and next week I’ll be playing with an Easter/Spring set that I’m sure you will love, too!
Papillion Potpourri

Thursday, March 7, 2013

Rainbow Butterfly

There is just something about rainbows and butterflies combined together that makes me happy and think of Spring!
Rainbow Butterfly
I used post-its to mask the edges of a white cardstock base, and used sponges to ink up the rainbow colors. Eggplant, Turquoise, Wasabi, Daffodil, Pumpkin Pie and Real Red layered to create the rainbow effect. The last touch was a sentiment from Word Play and the butterflies from  Papillion Potpourri. I love the stark contrast of the white and black with the pop of colors!
I have one more card to share tomorrow using this awesome set, what has been your favorite thus far?
Papillion Potpourri

Wednesday, March 6, 2013

Butterfly Thank You

Sometimes you see a card and you just can’t help but want to recreate it! (Otherwise known as CASEing a card.)
That was the case with the card below, with the original one created by Mary Fish.
Butterfly Thank You
So simple, but so elegant! I changed up the colors a little bit and used a little sentiment from Easy Events. This card doesn’t even use the Papillion Potpourri stamp set but just the Elegant Butterfly punch. Super easy!
I have one more card to share and a mini note card set and I think I still have plenty more projects I could make with this set! What do you think of it?
Papillion Potpourri

Tuesday, March 5, 2013

Hello Watercolor Butterfly

Butterfly week continues with the focus on the the Papillion Potpourri stamp set!
Today I am sharing a rainbow card that was brought to life with the help of an aqua painter to give it a watercolor look.
Butterfly Hello
The butterflies were all stamped in a darker ink onto lighter cardstock and then punched out. The colors used are Bashful Blue/Night of Navy, Certainly Celery/Old Olive, So Saffron/More Mustard, Pretty in Pink/Melon Mambo, Pale Plum/Elegant Eggplant. The sentiment was stamped in Basic Gray with a sentiment from the Lacy and Lovely set. This simple but cheerful card could brighten anyone’s day!

These butterflies make me wish for warmer weather, come on spring! :)
Papillion Potpourri

Monday, March 4, 2013

Butterfly Tag

Butterfly week continues with the focus on the the Papillion Potpourri stamp set!
Today I have a quick and easy tag that we did at my last workshop.
DSC_0161
I love Baja Breeze, Pink Pirouette and Going Gray paired together. It’s such a soft and subtle look. The poofy flower was made by stacking scallop circles and scrunching them in the center. To give the tag some dimension I stamped the silhouette of the butterfly, and then punched out the flowered butterfly using the Bitty Butterfly punch. The punched image was them mounted with dimensionals to lift it off the tag.
The Scallop Trim border punch was used on the pink panel and then Baja Breeze seam binding finished off the tag. This would be great to add to a bag for a birthday present or little gift!
I really love the variety this stamp set offers as the butterflies can be classic or whimsical depending on which style you use!
Papillion Potpourri

Saturday, December 15, 2012

Christmas Brunch

I hosted some friends on Saturday morning for a fun Christmas Brunch and jewelry party. I had such a blast putting it all together!

Christmas Brunch

I had my table set up with lots of yummy breakfast foods, and my bakers rack served as a drink station. Come see!


DSC_0730

My bakers rack: the drink station!

DSC_0722

I decked it out with garland, beads and mini ornaments. These will definitely be staying up through Christmas!

DSC_0728

I had a tray full of coffee cups, creamer, sugar and coffee, and also had a cute glass jar filled with Bailey’s Irish cream to add to your coffee.

DSC_0736

I have a couple of these glass bottles, they were a fun find at Ikea a few months ago!
DSC_0732

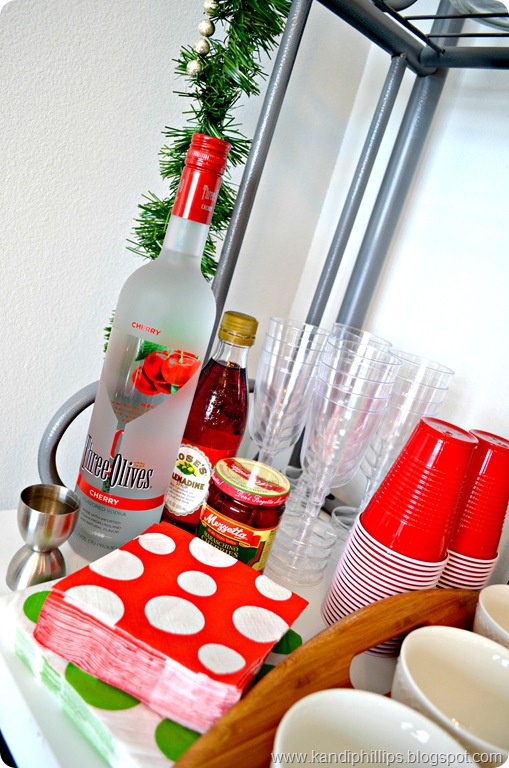
I did mimosas on the main table, but on this area I had everything to make Dirty Shirley’s which are basically Shirley Temple’s with vodka! (Thank you for sharing these at Bunco and giving me a new favorite drink Lyndi!)

DSC_0733

Dirty Shirley

  • 2 shots cherry flavored Vodka
  • Sprite
  • Splash of Grenadine
  • Maraschino cherries to garnish

Add vodka over ice in your glass, fill with Sprite, add a splash of grenadine and then cherries to garnish and stir. Warning: totally good and dangerous! ;)

Now the main part of the brunch!

DSC_0738

DSC_0740

I kept my red table runner and wood tray centerpiece that I had out for my Christmas décor, and added a black tablecloth underneath. I accented the table with doilies, pinecones, candy cane candles and silk flowers with rhinestone brads in the center. In a few places I used mini clothespins to add the flowers to the containers.

DSC_0741

Let’s dig into the food!

DSC_0745

I found the mini cups (Wal-Mart) that I put syrup in and added triangles of French toast to the edges for an easy and portable treat.

DSC_0748

There were donut holes next to the French toast…..
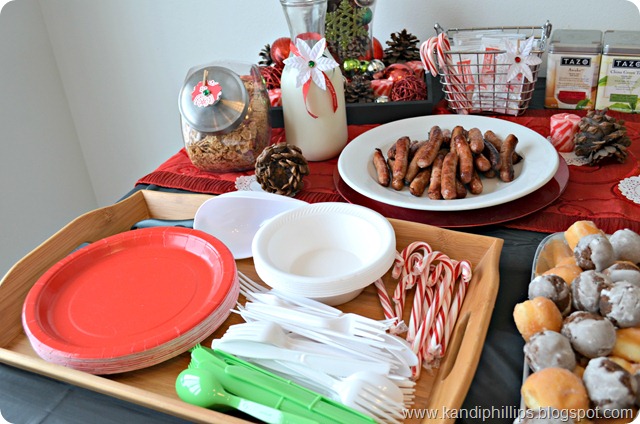
DSC_0749

and a tray with silver ware, plates and candy canes.

DSC_0751

I also set out sausage and had a container of Special K and milk for any cereal lovers!

DSC_0750

I added a punched scalloped circle with a mini clothespin to the lid of the cereal container. For the milk carafe I tied some Christmas ribbon around it and added a silk flower with a green rhinestone in the center.

DSC_0752

I had a metal basket filled with hot cocoa mix and more candy canes, and another clothespin flower.

There were also teas, orange juice and lemonade.

DSC_0753

We also snacked on mini pancakes topped with blueberries and decorative picks. There was also a fruit bowl with mandarin oranges, pineapples and grapes!
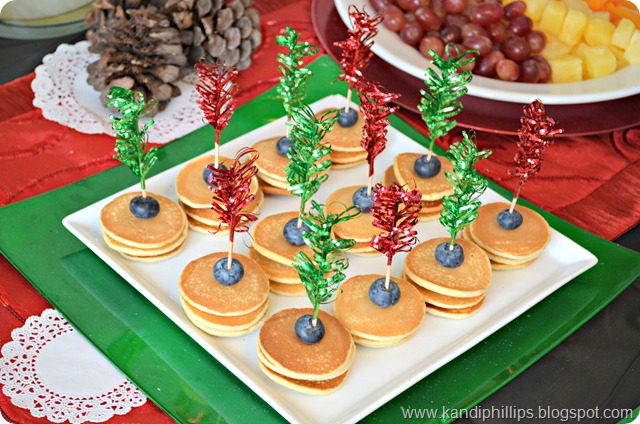
DSC_0754

One more picture of these cute pancakes!

DSC_0757

The galvanized bucket/container held the chilled champagne for mimosas.

DSC_0756

These little flowers came from my scrapbook stash, I’ll definitely be reusing these!
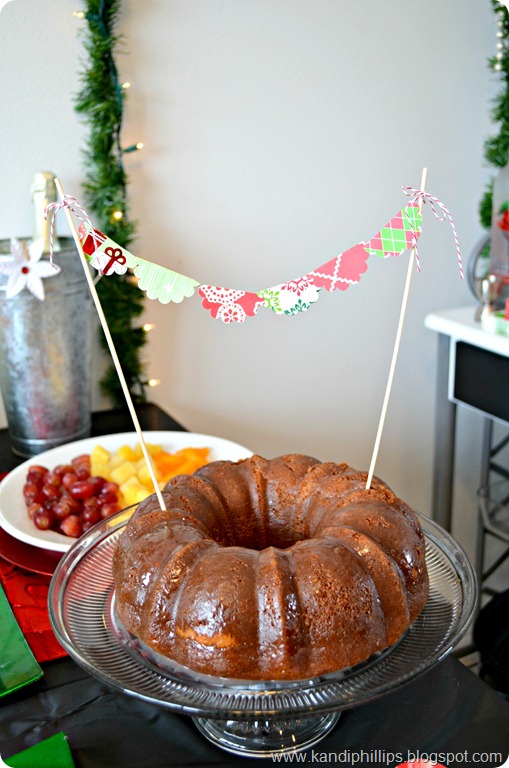
DSC_0759

I also pulled out a few more things from my craft stash! I used bakers twine and more of the scalloped punched circles to make this simple cake topper. Christmas paper really added to the Christmas spirit and feel! :) This is Raspberry Liqueur cake that I got the recipe from my friend Sharon. It’s super moist and delicious!

DSC_0758


Raspberry Liqueur Cake

CAKE

  • 1 pkg white cake mix
  • 1 small instant vanilla pudding
  • 1 cup raspberry liqueur or framboise
  • 4 eggs

SAUCE

  • 1/2 lb. butter
  • 1/4 cup raspberry liqueur or framboise
  • 1 cup sugar

For the cake: Mix ingredients together well, bake in bundt pan at 350 degrees for 30 min. For sauce: Mix together all sauce ingredients in sauce pan, heat until melted. Don’t let it burn or get too thick. When cake is done, loosen sides and pour sauce over cake and sides. Let stand 20 minutes as sauce will soak into cake. Turn out onto cake dish.


DSC_0761DSC_0762DSC_0763

A few more shots of the whole set up!

DSC_0767

You may have noticed my “faux” chalkboard with the menu. Instead of an actual chalkboard, I used a black poster board and made it look more like a chalkboard by writing on it and wiping it off with a towel.

DSC_0779

It’s night time and all cleaned up but I think I’ll be leaving this up for awhile longer. :)